Creating a Password Protected Website with IAP and Google App Engine
April 30, 2020
Categories: Tags:TL;DR: If you have a static website that needs to be password protected, using Google’s Identity Aware Proxy along with App Engine is one of the simplest ways to accomplish this.
If you want to follow along with a site of your own, I have provided a working example in this GitHub repo.
Note: I have also seen S3 + Lambda used to accomplish this
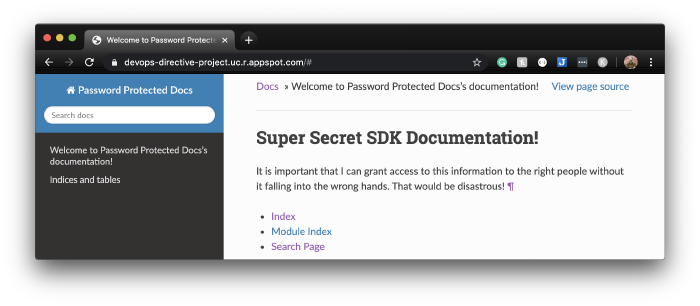
Table of Contents:
The Need
A company I have been working with (Gauntlet Networks) needed to set up a website containing documentation for the simulation SDK they are building but wanted to restrict access to only their clients and employees.
Other static hosting solutions
There are a plethora of high-quality, affordable options (GitHub Pages, Netlify, a Free Tier Cloud VM, or even an S3 bucket), but adding a layer of authentication makes the task significantly more challenging.
Netlify does offer password protection using basic authentication for their paid plans, but using this would still require distributing the password to the authorized individuals and rotating it whenever it was necessary to revoke anyone’s access.
Handling passwords
Historically, implementing authentication would require adding significant complexity to our website’s architecture. We would need a database of some kind to store the (hashed) passwords and server-side processing to check if a login attempt is valid. We would also probably need to add some form of email confirmation/password reset functionality because people are terrible at remembering their passwords. All of the sudden the one-hour task of getting the documentation site set up just ballooned into something that could take weeks to accomplish!
Luckily, we don’t need to take on all of this complexity ourselves. A standard called OAuth allows us to leverage the authentication system of another entity (for example, Google) to provide"secure delegated access" to our content.
Solution (IAP + App engine)
OAuth by itself would allow us to set up a sign-in flow using an external authentication provider, but for this use case, we want the process to be completely hands-off.
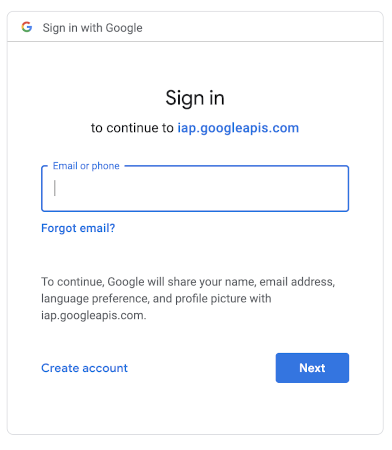
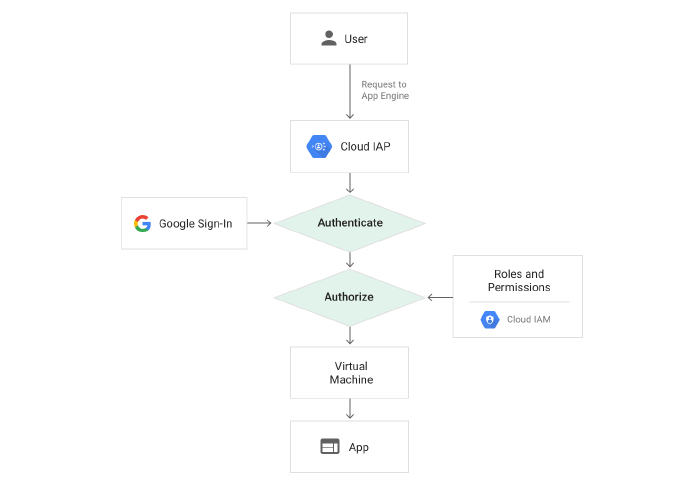
This is where Google’s Identity Aware Proxy (IAP) comes in. Cloud IAP uses Google Sign-In and GCP’s Identity and Access Management (IAM) to handle authentication and authorization to control access to GCP resources. Granting access to the site can then be managed using individual Google accounts and/or Google groups.
Given that Gauntlet was already using Google Cloud Platform, leveraging IAP in conjunction with Google App Engine to host the static site provided a simple, clean solution to satisfy the need.
Example Site
Because a documentation website was the use case that inspired this post, I am using the Sphinx Python documentation generator quick start as the basis for this demo. The static site files will be hosted using App Engine, with CircleCI for CI/CD.
Configuring App Engine
Google has documentation outlining how to use app engine to create a static site by adding an app.yaml file to the codebase that tells App Engine how to interpret URL request paths. Sphinx stores its output in the /docs/build/html directory by default, so I used the following app.yaml:
runtime: python27
api_version: 1
threadsafe: true

handlers:
- url: /
  static_files: docs/build/html/index.html
  upload: docs/build/html/index.html

- url: /(.*)
  static_files: docs/build/html/\1
  upload: docs/build/html/(.*)
With this in place, running the gcloud app deploy` command within the root of the project deploys the application.
Setting up IAP
With the website deployed, the next step was to follow Google’s guide to enabling IAP for App Engine.
This involves configuring a few things for the Oauth Consent page (app name, support email, etc…), but the process is relatively painless.
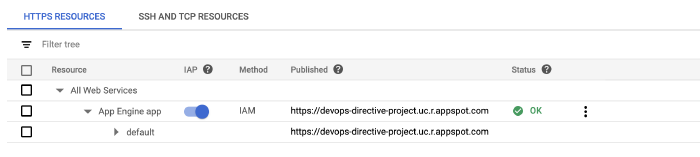
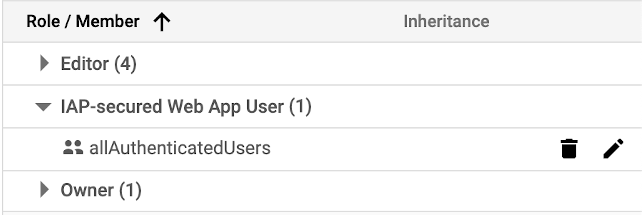
The final step is to grant the IAP-secured Web App User access to all authorized individuals. In the screenshot below, I granted access to allAuthenticatedUsers which allows anyone with a Google account to access it. (Test it out here!)
Configuring CI/CD with CircleCI
At this point, the website is live and access controlled, but to minimize future work, it is useful to set up a system to handle continuous integration and deployment.
CircleCi offers simple integration with GitHub and a free tier that will easily handle a small project like this. The first step is to create a CircleCI account and then grant access to the GitHub repo containing the source files using their GitHub marketplace app.
Workflow
To define our workflow, we create a file at .circleci/config.yml containing two parts, a workflow definition and a job definition.
We define the workflow using version 2 of the CircleCI API. This workflow tells CircleCi to run the build_and_deploy job on any push to the master branch.
workflows:
  version: 2
  build_and_deploy:
    jobs:
      - build_and_deploy:
        filters:
          branches:
            only:
              - master
Next, we define the build_and_deploy job. Each CircleCI job runs within a Docker image, and because the goal is to deploy to Google App Engine, the google/cloud-sdk provides a good starting point.
version: 2.1
jobs:
  build_and_deploy:
    docker:
        - image: google/cloud-sdk:slim
    steps:
The job is broken down into four steps:
- checkout,
- Sphinx installation,
- Generating the website
- Deploying to App Engine
1) checkout
- checkout
As its name suggests, this step retrieves the source code within the repo and stores it in the working directory.
2) Install Sphinx
      - run:
          name: Install Sphinx
          command: |
            apt install -y python-pip && \
            python3 -m pip install -r requirements.txt
The google/cloud-sdk:slim container image we are using is based on Debian, so we can install Sphinx and its dependencies by first installing pip with apt and then using pip to install the requirements.txt file.
3) Make Docs
      - run:
          name: Make Docs
          command: |
            cd docs && make html
The Sphinx quickstart creates a Makefile within the /docs directory which can be used to generate the documentation site. This step changes directory into /docs and executes this make target passing html as the destination for Sphinx to store its output.
Note: html here needs to match the directory used in the App Engine app.yaml config (make html will build the site into docs/build/html where App Engine is configured to find them)
4) Deploy Docs
      - run:
          name: Deploy Docs
          command: |
            echo ${GCLOUD_SERVICE_KEY} > /tmp/sa_key.json
            gcloud auth activate-service-account --key-file=/tmp/sa_key.json
            rm /tmp/sa_key.json
            gcloud --quiet config set project ${GOOGLE_PROJECT_ID}
            gcloud --quiet config set compute/zone ${GOOGLE_COMPUTE_ZONE}
            gcloud --quiet app deploy
The final step in the job is to deploy the site. To do this, we first need to create a service account (https://console.cloud.google.com/iam-admin/serviceaccounts) and grant it the necessary permissions. Although it seems as though App Engine Deployer would be sufficient, it turns out there are actually a few additional permissions involved with deploying the site. The screenshot below shows the 5 roles I needed to add to achieve a successful deployment.

At this point I created a key for the service account (.json format) and stored its content as an environment variable in CircleCI. I also stored the Zone and Project ID as environment variables to ensure the deployment was targeting the correct app engine environment.
There was one final “gotcha” having to do with the service account key. My first attempt tried to pass it into the gcloud auth command by piping it in as follows:
echo ${GCLOUD_SERVICE_KEY} | gcloud auth activate-service-account --key-file=-
This caused gcloud to assume the key was a .p12 type and fail.
ERROR: (gcloud.auth.activate-service-account) Missing required argument [ACCOUNT]: An account is required when using .p12 keys
As shown in the full example at the beginning of the step, I was able to solve this by redirecting the echo output to a temporary file containing the JSON key and passing the file path to gcloud auth.

That’s it! We now have a password-protected website, with CI/CD, that falls within the free usage tiers of GCP + CircleCI. If this site had heavy traffic or data egress it could exceed the free tier but for this internal documentation use case that is unlikely.
Next steps
There are a couple of additional steps that I will leave as an exercise to the reader.
Custom Domain
By default, App Engine assigns a domain such as https://devops-directive-project.uc.r.appspot.com/ to the website. It is possible to map a custom domain to the site by following this guide from Google.
Custom OAuth screen
The default OAuth consent screen is fairly boring but can be customized with a logo image, application homepage link, etc… from Google Cloud Console